How the interface works
Menu, lists, cards, search, filter, column setup and the help button: where things are and how to use them.
Skladnyk has only three kinds of screens: the menu at the top, a list (a table of records) and a card (one record). Once you can work with one list and one card, you can work with all of them.
Menu
The top row holds the sections: Dashboard, Purchases, Sales, Products, Counterparties, Warehouse, Money, Retail, Production, Reports, Integrations. Hover over a section to see its items. The second row shows the items of the current section for quick switching.

On the right of the header: the theme switch (light or dark), chats, the knowledge base ("?" icon) and the user menu with settings, subscription and sign-out.
List
Open, for example, "Sales" → "Shipments". You see a table: one document per row.
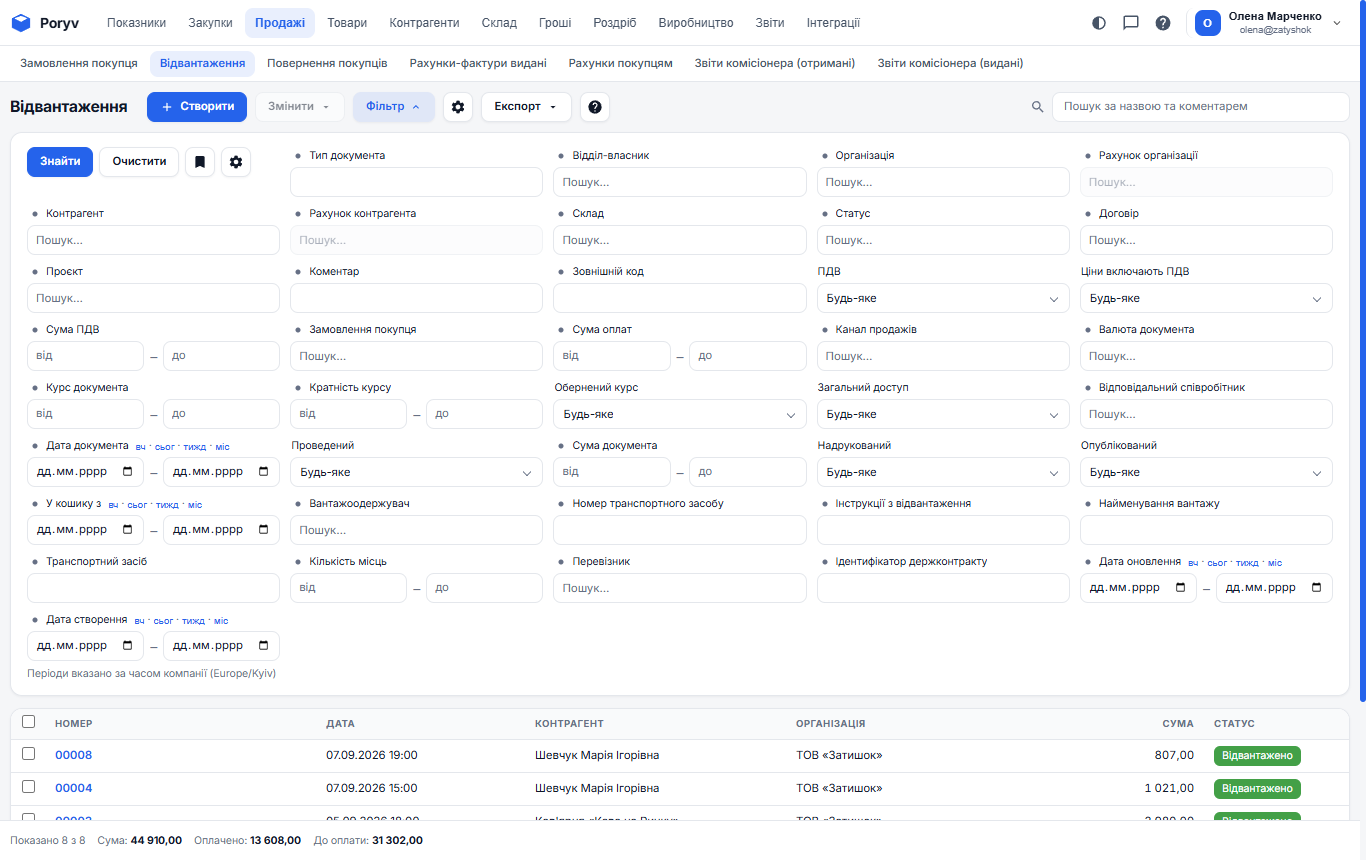
What is here:
- "+ Create" - a new record.
- Checkboxes to the left of rows - select several records to apply one action with the "Change" button: post, unpost, delete.
- "Filter" - show only the records you need (see below).
- Gear - set up the table columns.
- "Export" - download the list to Excel.
- "?" - the help article about this very list.
- Search on the right - by name, number, comment.
- Clicking a row opens the record card.
At the bottom of the list are totals: how many records are shown, total amount, paid, due.
Filter
Click "Filter" to open the panel of fields. Fill in one or more fields and click "Find". For example, to see shipments to one customer for the past week, pick the counterparty and click "week" next to the document date.
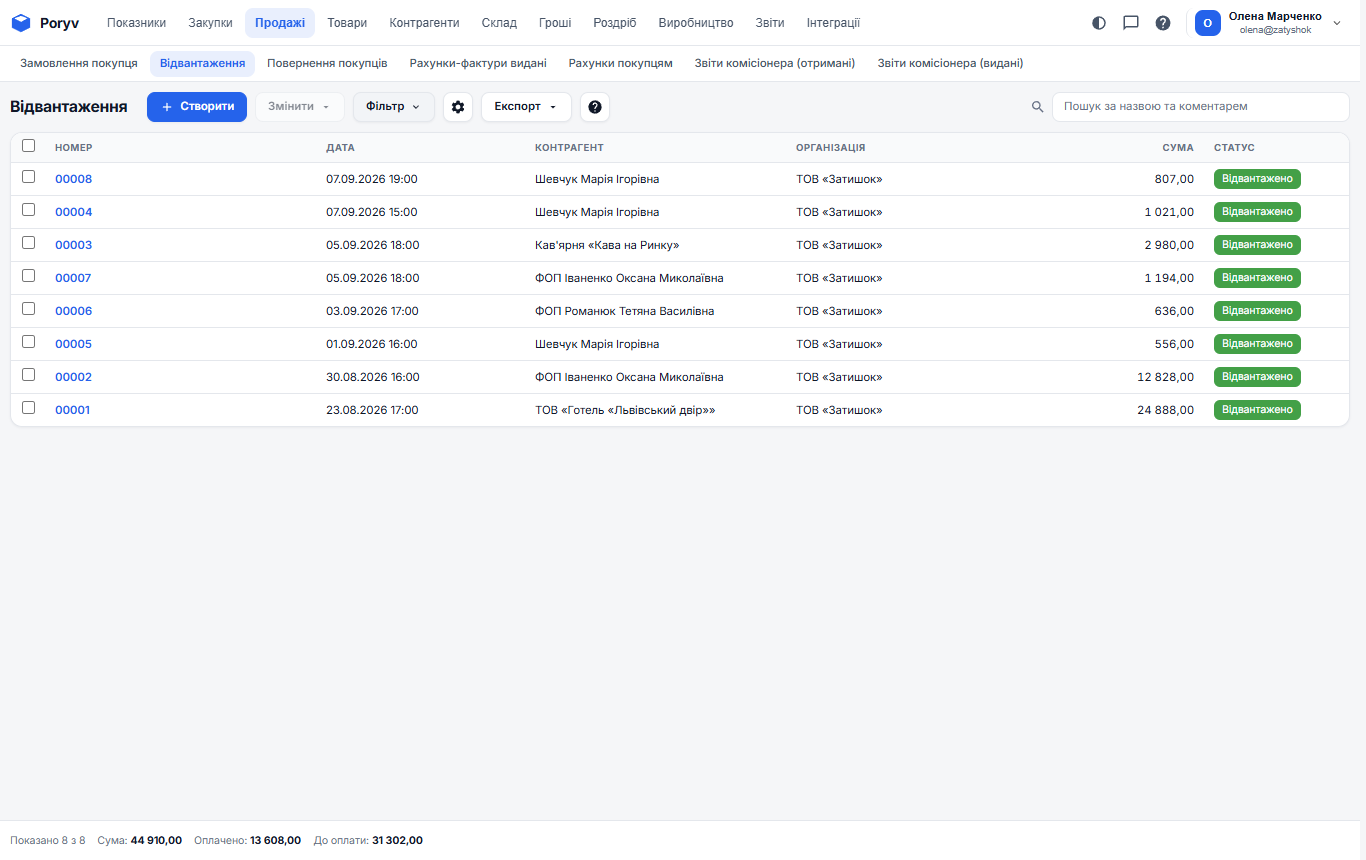
"Clear" removes all conditions. The bookmark button saves the current filter so you can open it later with one click.
Table columns
Click the gear above the list. In the "Columns" window tick the columns to show and drag them into the order you want. In the order list, for instance, it helps to enable "Paid" and "Shipped" to see the state of every order without opening it.
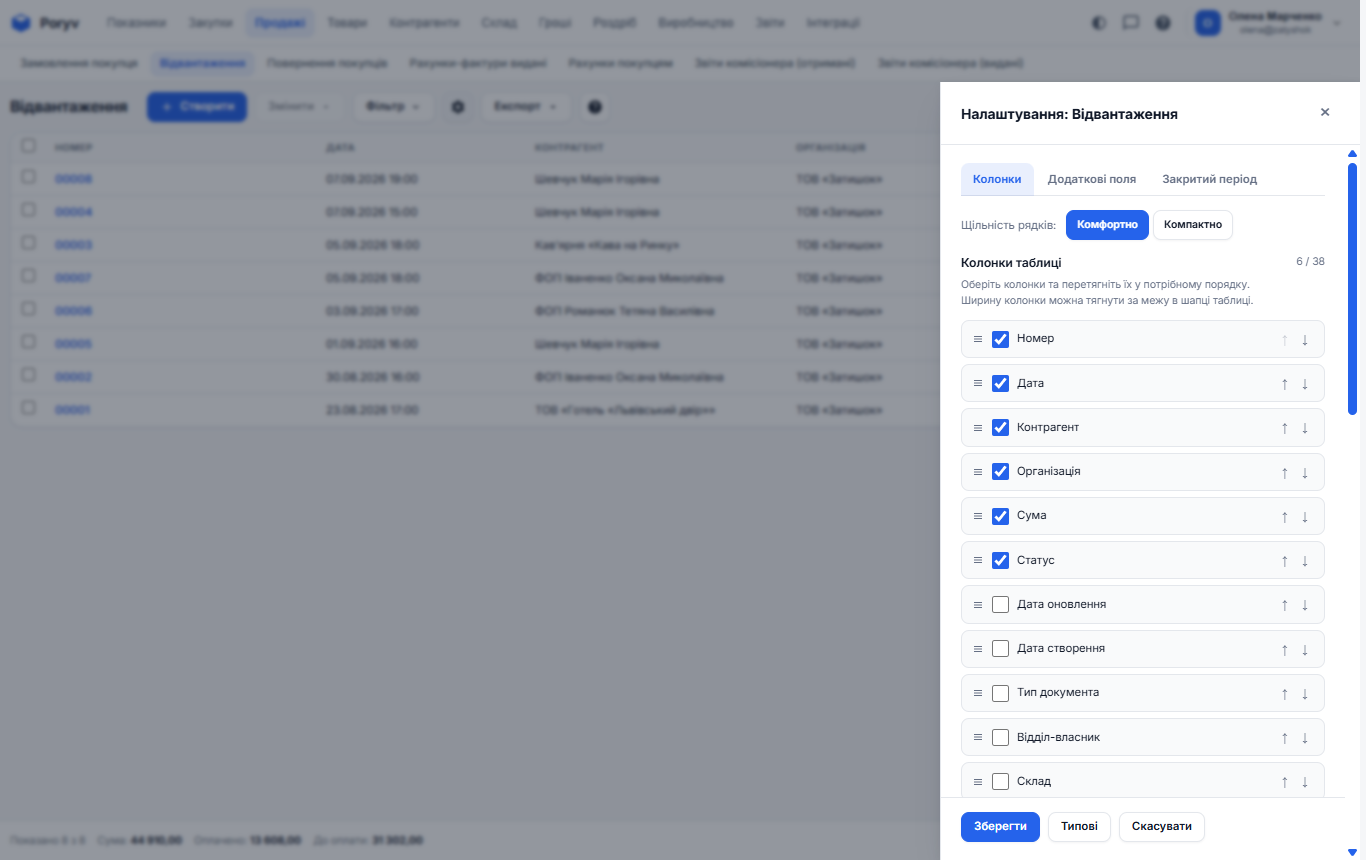
Column setup is personal: your colleagues' tables look their own way. The "Default" button restores the standard view.
Document card
Clicking a list row opens the card. A document card has three parts.
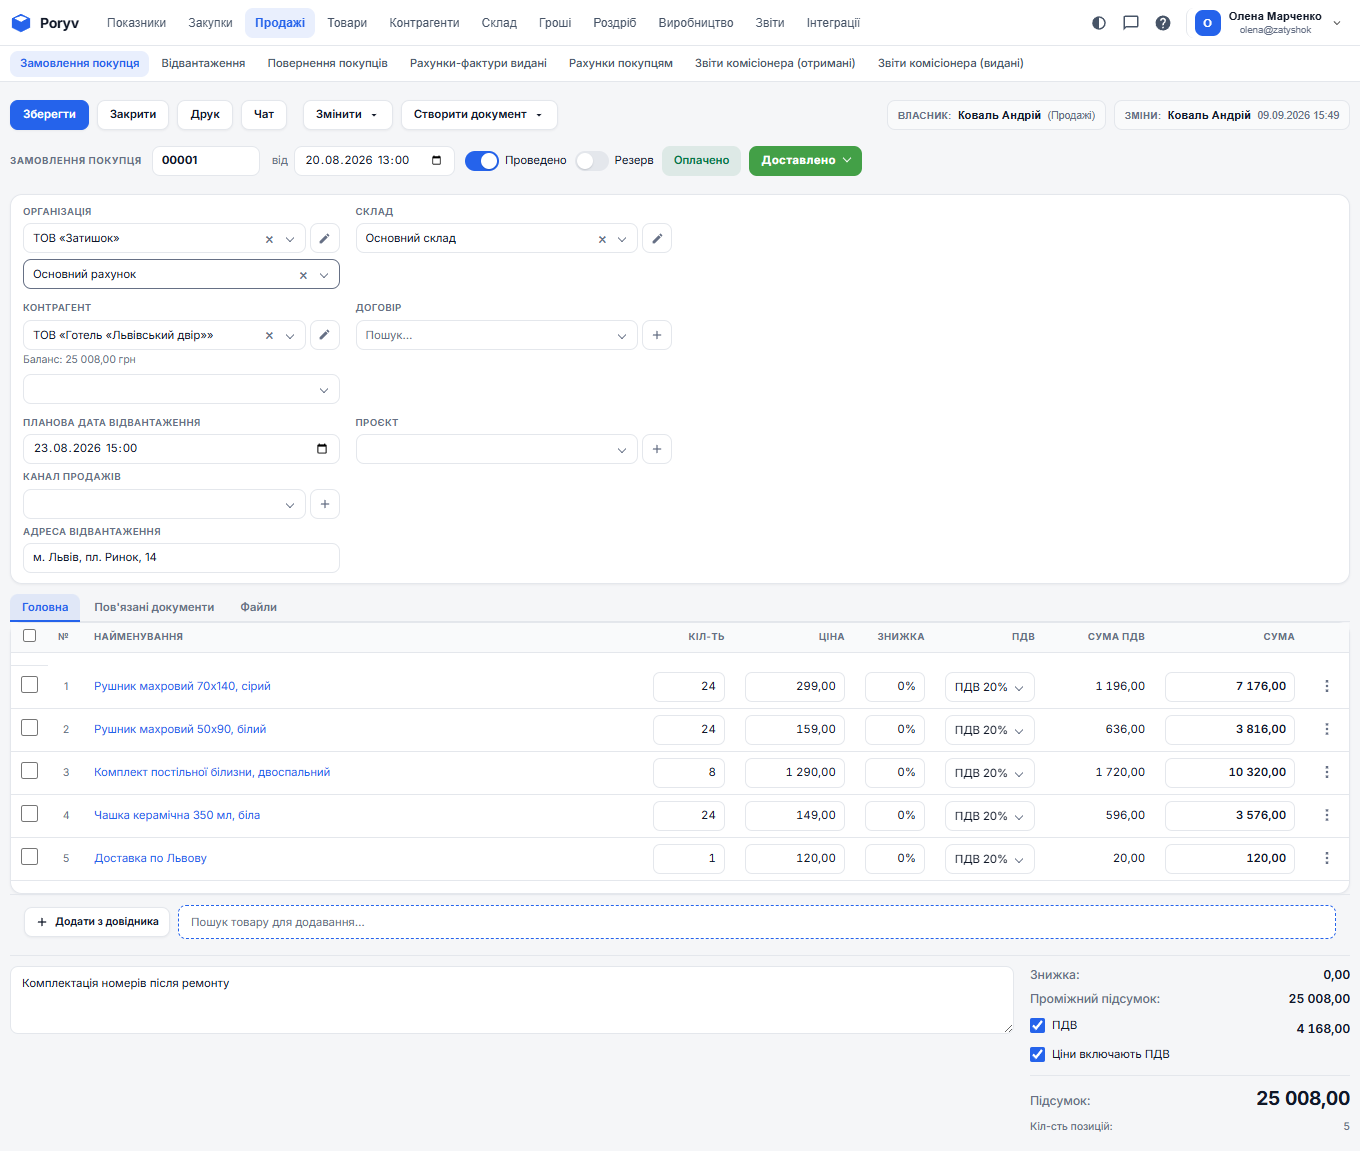
- Buttons at the top. "Save", "Close", "Print", "Chat", "Change" (duplicate, delete) and "Create document" - create the next document in the chain, such as a shipment from an order.
- Header. Number, date, the "Posted" toggle, the payment mark ("Paid" / "Not paid") and the status. Below are the organization, warehouse, counterparty and other fields. The counterparty's balance is shown right next to it.
- Tabs. "Main" - the table of lines (products, quantity, price, amount). "Linked documents" - the chain diagram: order, invoice, shipment, payment. "Files" - attachments.
Under the lines table are the comment field and the totals: discount, VAT, amount.
Dictionary card
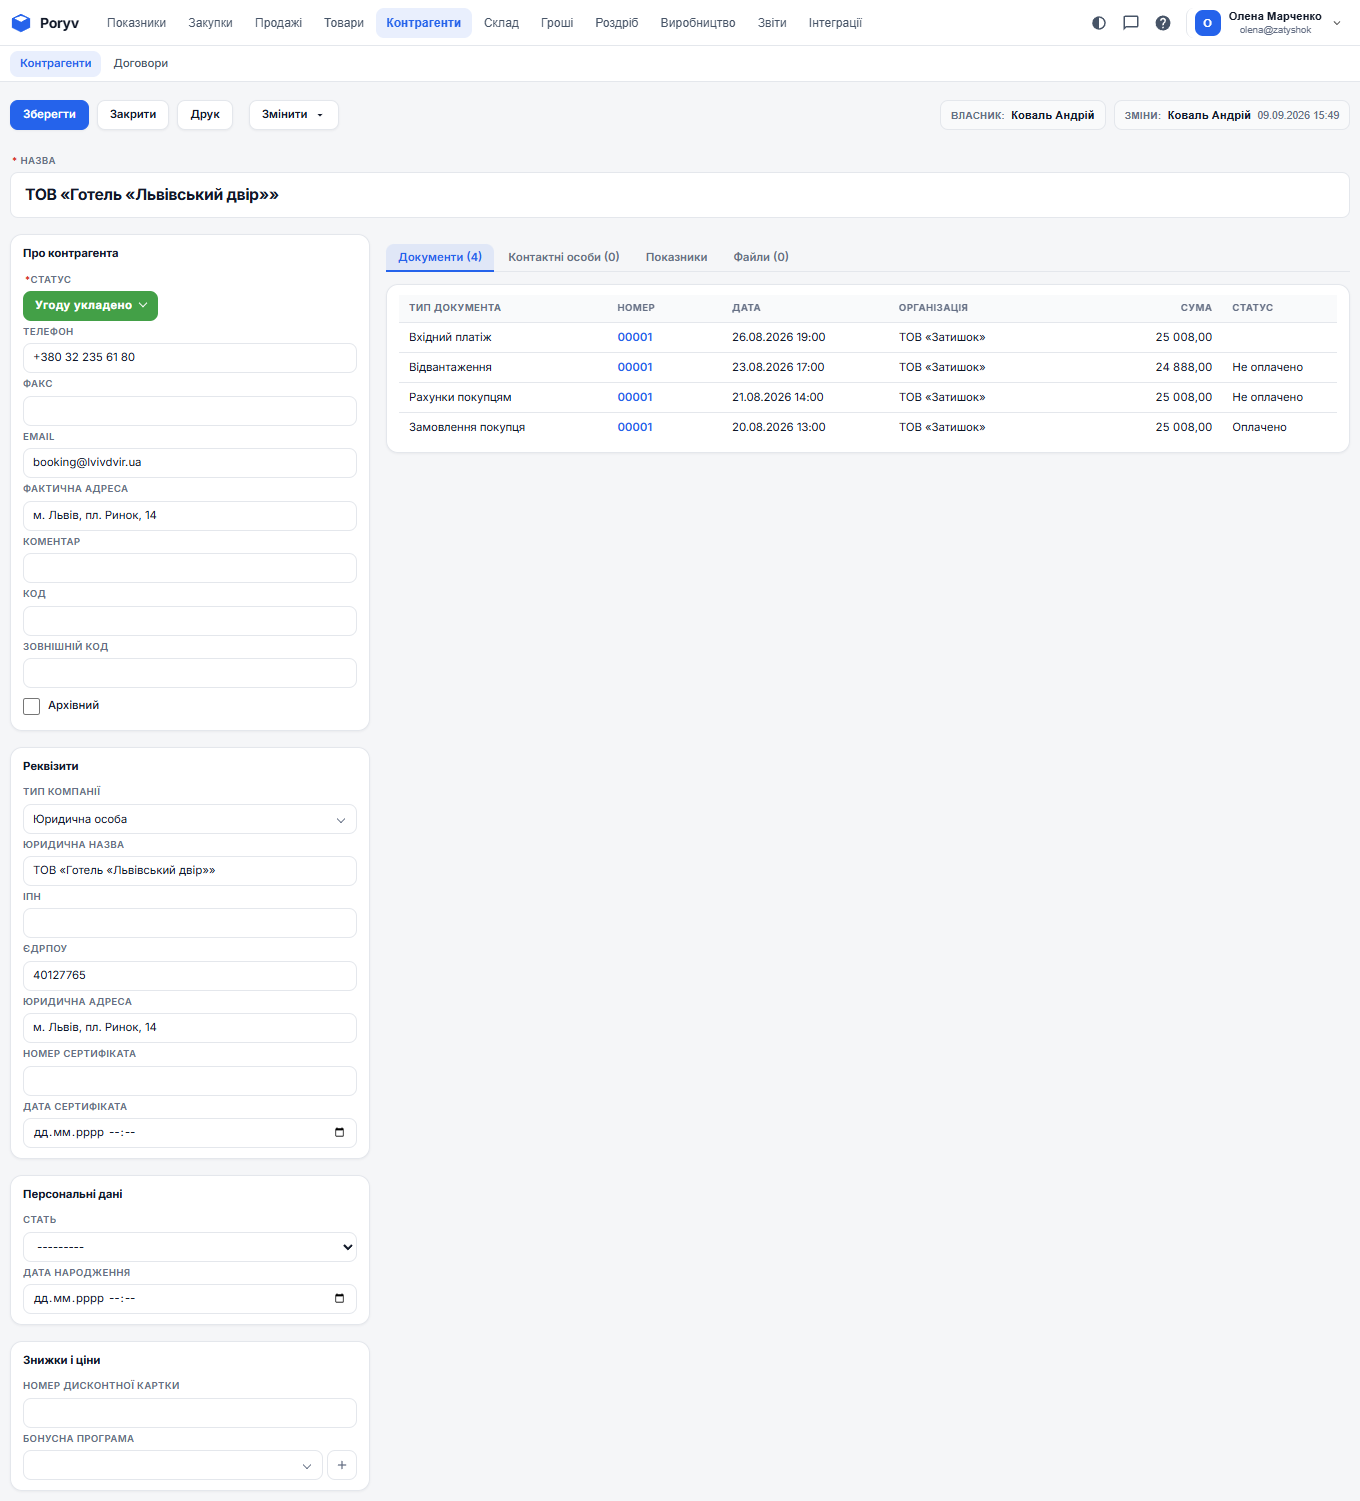
A product or counterparty card is simpler: fields on the left, tabs on the right. In a counterparty card, for example, the "Documents" tab shows all their documents with payment marks, and the "Indicators" tab shows how much they bought and owe.
Lookup fields
A field with an arrow (warehouse, counterparty, product) is a choice from a list. Start typing the name and the list narrows down. The "+" button next to the field creates a new record without leaving the document. The pencil opens the card of the selected record.
Help
The "?" icon is above every list and in the program header. It opens the knowledge base on the article about the current section. Search across all articles works there too.
Updated: